Working with Dashboard
Table of contents
The Data+Design web application allows you to create, edit and delete dashboard, sections and indicators. To do so, you must be signed in with an administrator account.
Dashboard
Create a dashboard
- To create a new empty dashboard from scratch, click the Gear button on the main page, then choose Create Dashboard. -
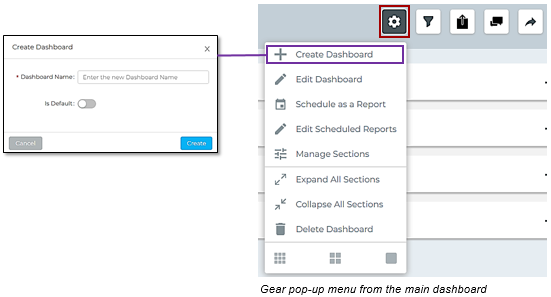
- Enter the new dashboard name. You can make it into a default dashboard by clicking the Default toggle switch.
- Once you’re done, click the Create button.
Edit a dashboard
- To make changes on a dashboard, open the dashboard first using Dashboard Selector located in the main page.
- Click the Gear from the dashboard, then choose Edit Dashboard. -
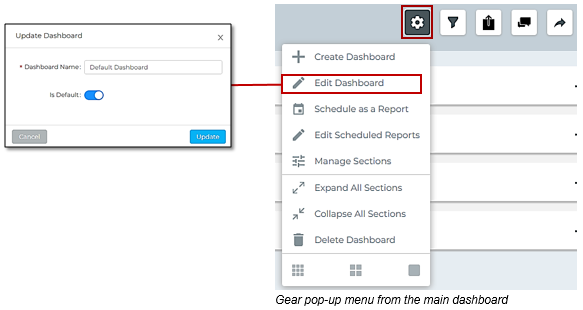
- Change the name of the dashboard in the name field and then click Create.
Delete a dashboard
Warning
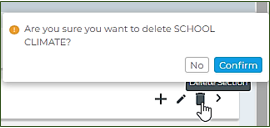
Deleting a dashboard will also remove any sections, indicators and alerts you have configured on that dashboard. To delete a dashboard you are currently viewing, follow these steps: * Click the Gear from the dashboard, then click Delete Dashboard, and then click Confirm to proceed.
-
Indicator
Add existing indicator
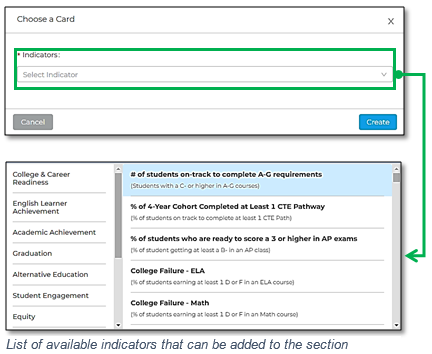
Add existing indicator to a section.
-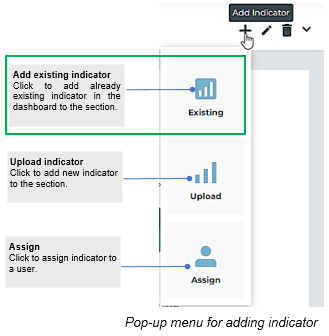
- Navigate the dashboard, then click the plus (+) of the section, choose Existing.
- Click the Disclosure button, then choose the indicator.
- Once you’re done, click Create.
-
Add a dataset (indicator) to a dashboard
You can upload external data in a .csv or excel format through the user interface.
- Navigate the section where you want to upload the indicator and click plus (+). -

- Click Upload, a user interface will appear to help you upload the dataset. -
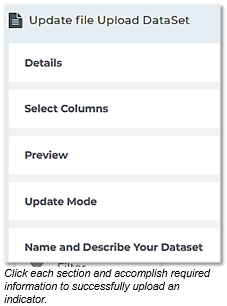
- Under Details section, import the .csv or excel, then click Next.
- Under Select Columns section, select the columns that you want to be included in the indicator, then click Next.
- Preview the dataset under Preview section, then click Next.
- Select the update mode under Update Mode section, then click Next.
- Under Name and Describe Your Dataset section, give the indicator a name and choose the appropriate chart.
- Once you’re done, click the Update.
Rename indicator
- Navigate the dashboard and click the Gear of the indicator, choose Rename. -
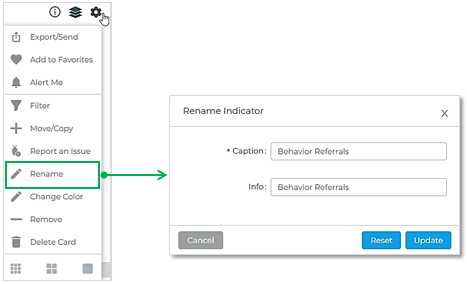
- In the Caption field, type the new name for the indicator. You may also want to put some information in the Info text field.
- Click Update to apply changes.
Upload Cohort
- Create cohort file for uploading (csv or excel).
- Navigate to the dashboard and click Upload Cohort located just above the sections. A new user interface will appear to help you upload cohort.
- Under Details section, upload the .csv or excel file.
- Once you’re done, click Next.
- Under Student Details and Dataset section, fill in the required fields.
- Once you’re done, click Submit.
If it was successful, a message should display informing the file was uploaded.
Chart
Change chart color
Maybe your indicator needs a little something else to make it more impactful. You can change the color of your chart.
- Choose the chart that you want to change. Click the Gear button, then choose Change Color. -
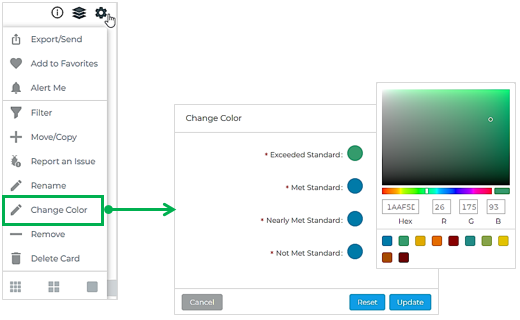
- Click on the color that you want to change and pick the color scheme you want.
- Once you’re done, click the Update button.
Resize all charts
You can resize charts in a dashboard all at once in just one click.
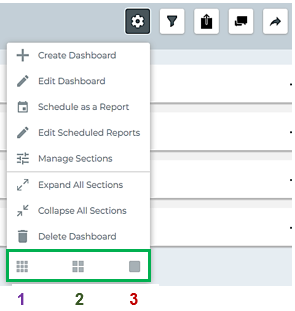
- Navigate the dashboard and click the Gear button located just above the sections, then choose the squares to resize the charts in the dashboard.
-
Resize a single chart
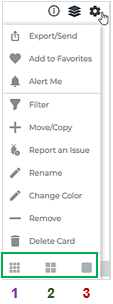
- Navigate the Card and click the Gear button, then choose the square to resize the chart. -
Card
Delete Card
- Navigate the Card and click the Gear button, then click Delete Card.
Remove Card
- Click on the indicator’s Gear button and choose Remove, then click Confirm to remove card from the section.
Section
Create a section
- Navigate the dashboard and click the Gear button located just above the sections. -
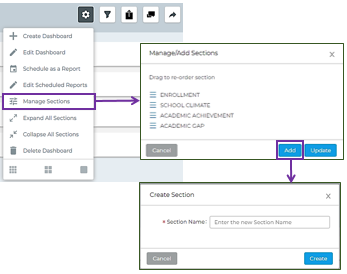
- Click Manage Sections, then choose Add.
- Enter the new section name.
- Once you’re done, click Create.
Edit section name
- Navigate the section and click the Pencil button.
-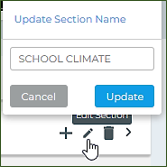
- Give the section a new name.
- Once you’re done, click Update.
Delete a section
- Navigate the section and click the Trash bin button, then click Confirm to delete section.
-